Datto Networking Appliance (DNA): Getting started
This article provides an overview of the Datto Networking Appliance's features. For region and hardware specification information, see Datto Networking Appliance (DNA): Region And Hardware Specifications.
Environment 
- Datto Networking Appliance (DNA)
Description 
Index 
- Deployment
- Accessing Your Appliance
- Creating Networks
- Creating LANs
- Navigating the Interface
- Hardware Legend
- Removing a DNA
Deployment

To deploy the Datto Networking Appliance, follow the steps in our Datto Networking Appliance (DNA): Hardware installation guide. For an in-depth video tour, see the following video.
Accessing Your appliance

The Datto Networking Appliance uses a web-based management interface. To access it, you will need to install the device and log into it using your Datto Partner Portal account. Refer to Setting up the Datto Networking Appliance (DNA) and Accessing Your Cloud-Managed AP, Switch Or DNA to learn more.
Creating networks

To configure a wireless network, see our Datto Networking Appliance (DNA): Creating or adding wireless (WiFi) networks article. To set the wireless network broadcast frequency that your device uses, or to globally enable or disable the broadcast of wireless networks from the appliance, review our Datto Networking Appliance (DNA): Global WiFi Settings article.
Creating LANs

You can create up to four unique LANs on the Datto appliance. To get started, see Datto Networking Appliance (DNA): LAN Settings.

The Datto Networking Appliance features many additional customization options that you can access in the appliance GUI.
Status page
The Status page provides network reporting and management options. It contains the following features. Click a feature name to learn more.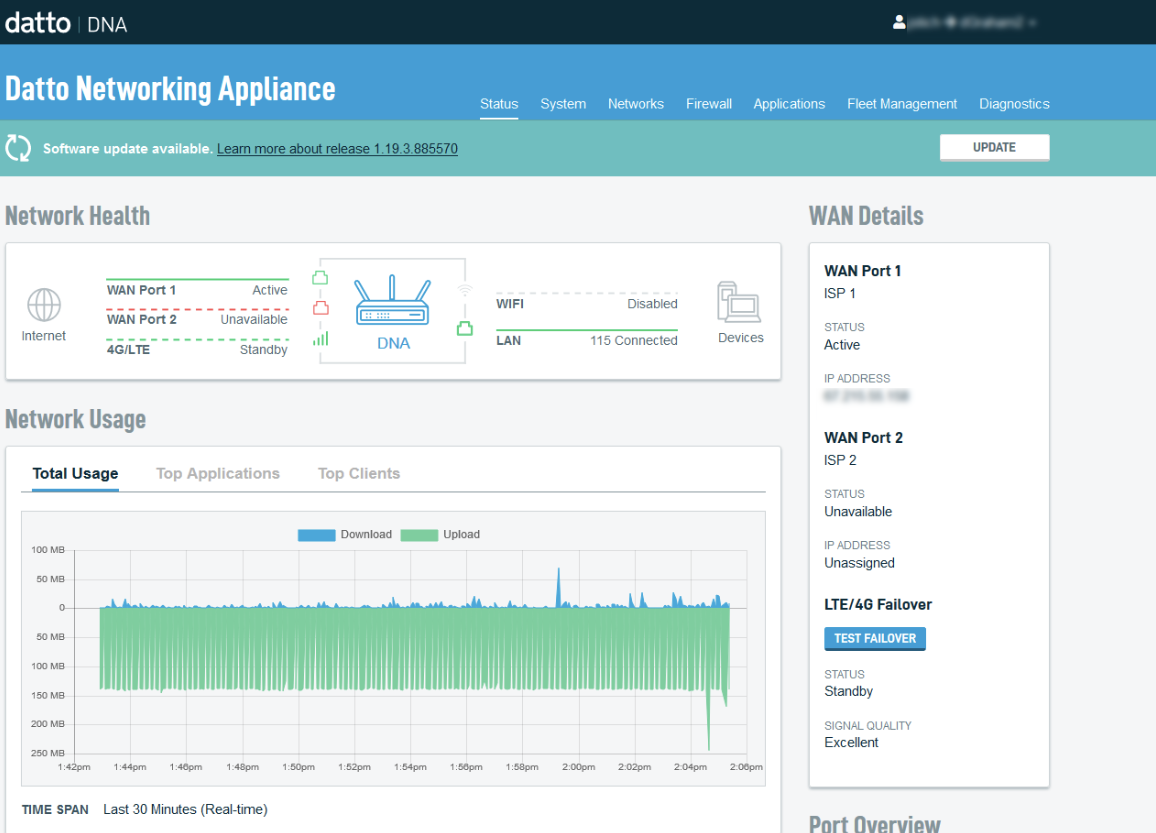
- Network Health
- Network Usage
- Browse Networks
- Recent Events (Logs)
- Router Details
- Port Overview
- WAN Details
- VPN Tunnels
System page
The System page provides system management options for your Datto Networking Appliance. It contains the following features. Click a feature name to learn more.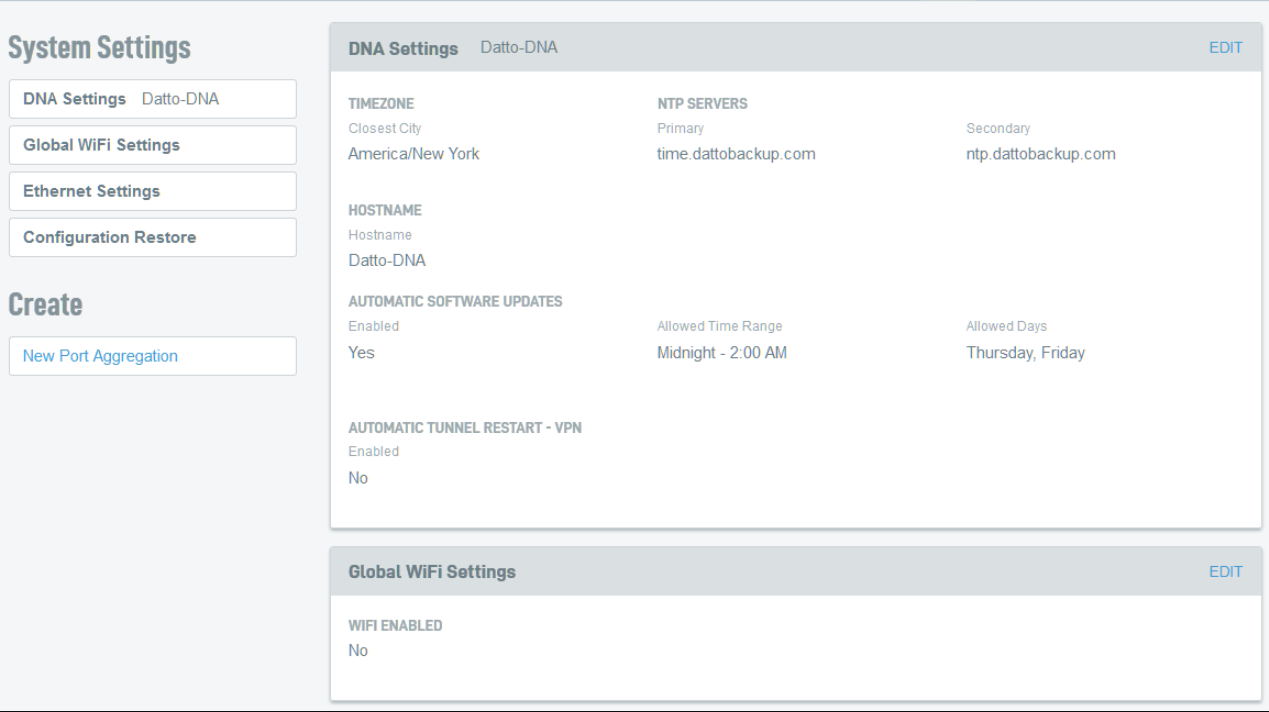
- DNA Settings
- Global WiFi Settings
- Ethernet Settings
- Alerts Configuration
- Configuration Restore
- Port Aggregation
Networks page
The Networks page allows you to configure all primary networking options for your Datto Networking Appliance. It contains the following features. Click a feature name to learn more. 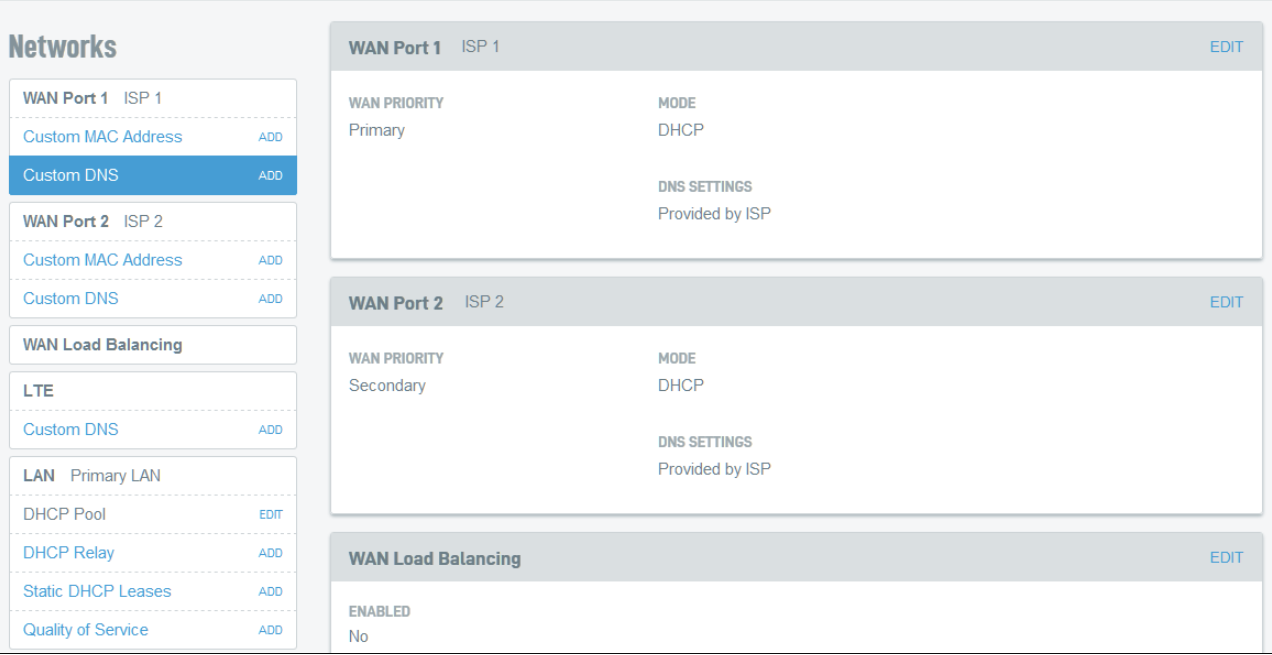
- WAN Port Settings
- WAN Load Balancing
- LTE
- LAN Settings
- Site-to-Site VPN
- Client VPN
- Static Routes
- Adding Another LAN
- New WiFi Network
- Global DNS
Firewall page
The Firewall page allows you to configure advanced networking and security options for your Datto Networking Appliance. It contains the following features. Click a feature name to learn more. 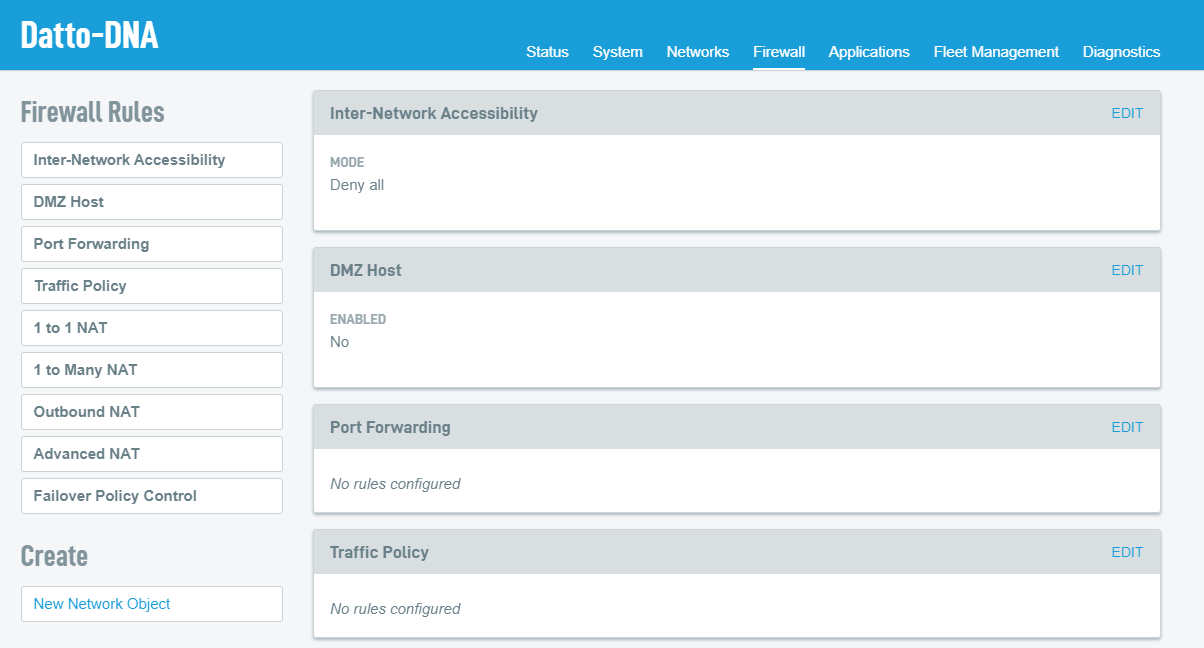
- Inter-Network Accessibility
- DMZ Host
- Port Forwarding
- 1 to 1 NAT
- 1 to Many NAT
- Outbound NAT
- Advanced NAT
- Failover Policy Control
Applications page
The Applications page allows you to set Intrusion Detection & Prevention (IdP) rules, configure web filters, and create conditional DNS forwarding and static host mapping rules. It contains the following features. Click a feature name to learn more. 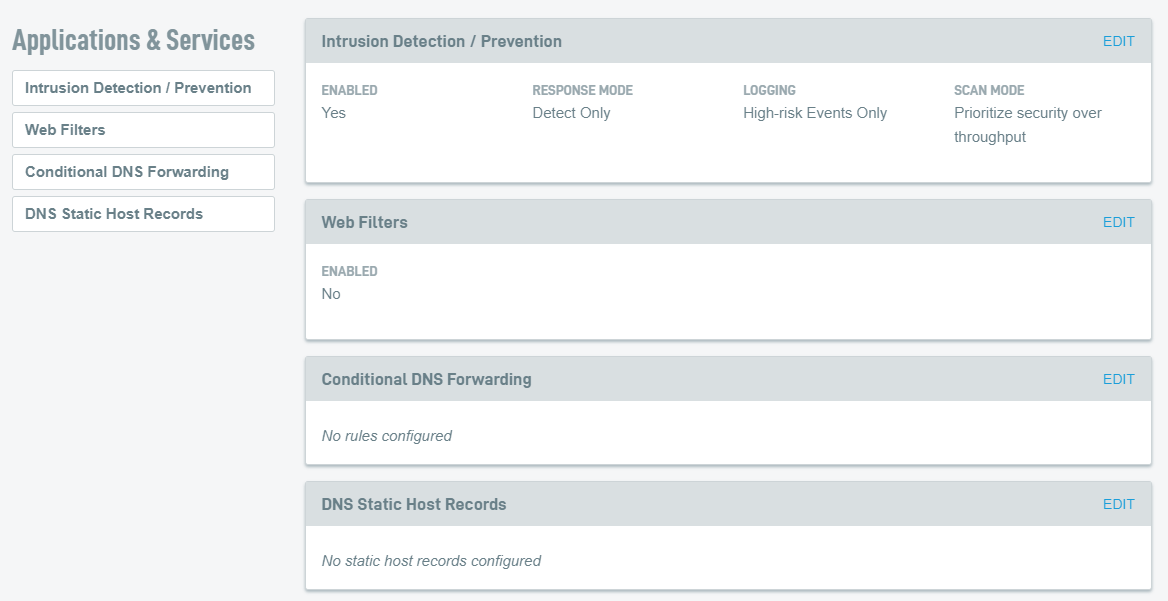
Fleet Management page
The Fleet Management page lets you copy the configuration from the DNA you're currently managing to other DNAs in your fleet. Select the check boxes for each device you wish to configure, then click the Apply Configuration button.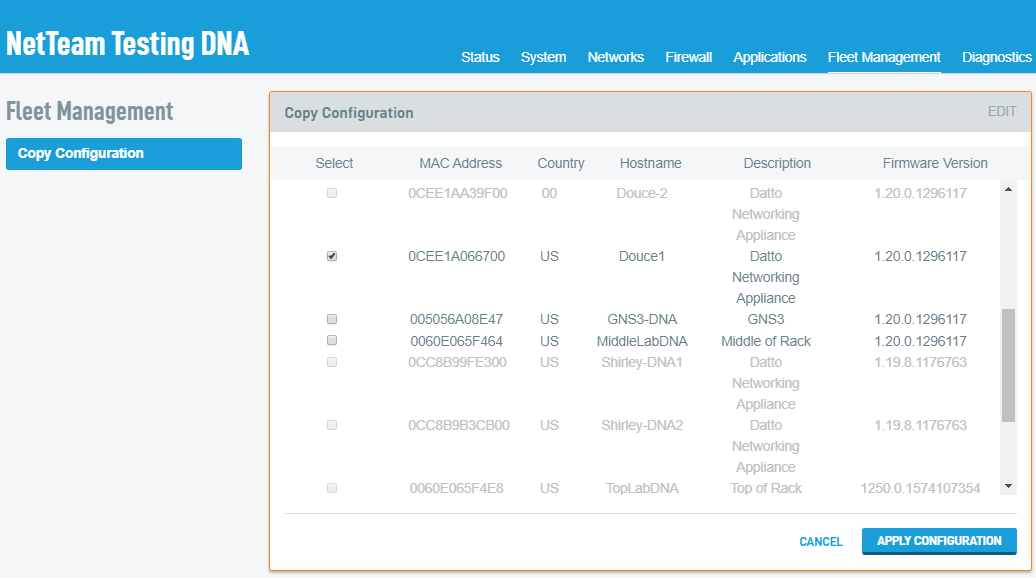
The source and destination devices must be running the same firmware version in order to copy configuration. For more information please see: Copying the configuration from one DNA to another.
Diagnostics page
The Diagnostics page provides tools to assess and troubleshoot a network using your Datto Networking Appliance. Click a tool name to learn more.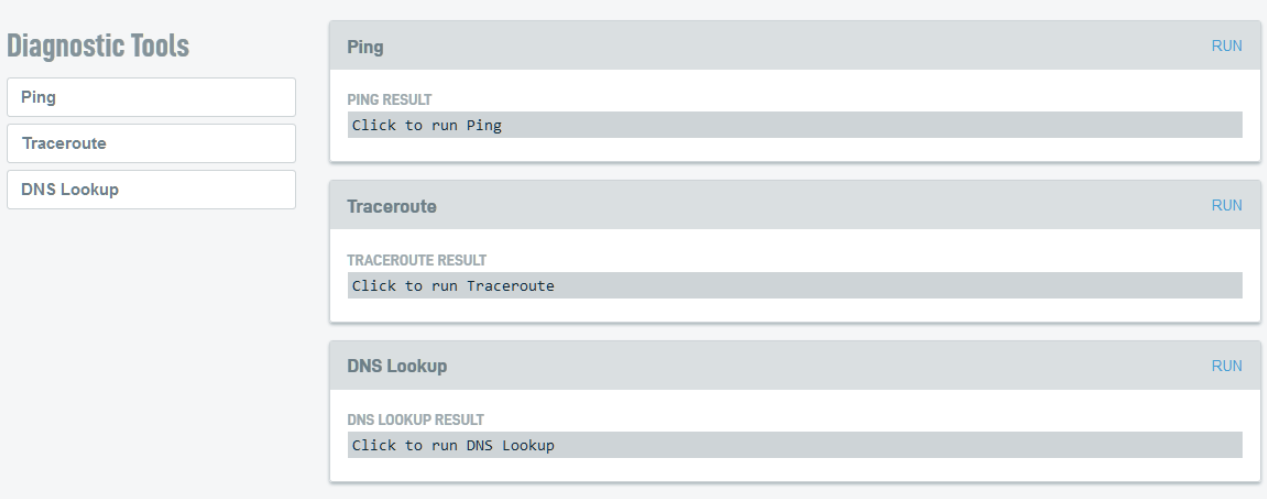

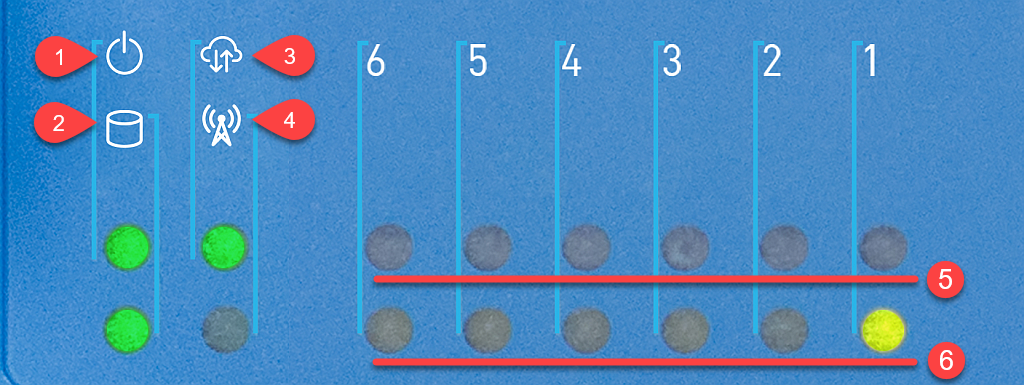
Front faceplate
- Power
- HDD Activity
- Offsite server connectivity
- LTE connectivity status
- Green = Gigabit connectivity
- Amber = ~100 Mb connectivity
- Port 1 - 6 connectivity status
- Green = Gigabit connectivity
- Amber = ~100 Mb connectivity Port 1 - 6 activity
Rear faceplate
- Power switch
- DC in
- Factory reset pinhole
- Reboot pinhole
- Ports 1 & 2 (WAN)
- Ports 3 & 4 (LAN)
- Ports 5 & 6 (LAN)
- 2x USB 2.0 (currently unused)
- Console Port
Removing DNAs from the Partner Portal 
Datto Networking Appliances are automatically removed from the Partner Portal when they are received back by the warehouse. In extenuating circumstances where the DNA is lost, stolen, destroyed or will otherwise never legitimately be expected to be activated again, contact Datto Technical Support for assistance.
